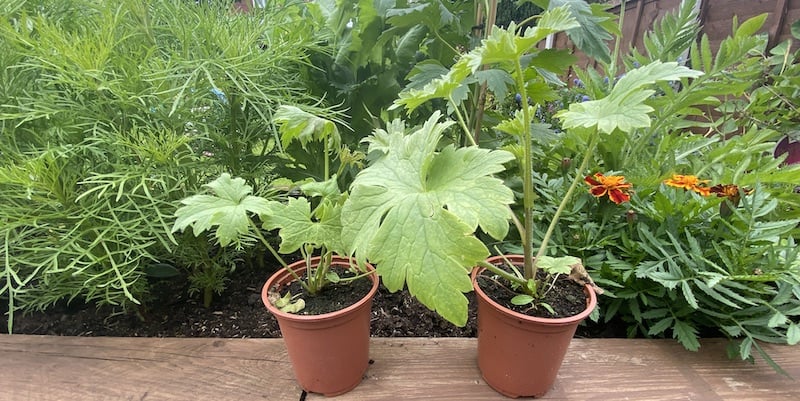
How to grow delphiniums from cuttings
Our site is reader supported, this means we may earn a small commission from Amazon and other affiliates when you buy through links on our site.
Taking a cutting from delphiniums in order to grow a new plant is one way of propagating delphiniums and is probably my favourite way to propagate delphiniums but it’s not the only way. (See Growing delphiniums from seed for another way) but I also like to divide them every 3 years which I cover in this guide in more detail. Growing delphiniums from cuttings takes some attention to detail.
In this guide below though, I show you how to take basal cuttings and then how to grow them further in nice small compact plants.
How to take the delphinium cutting
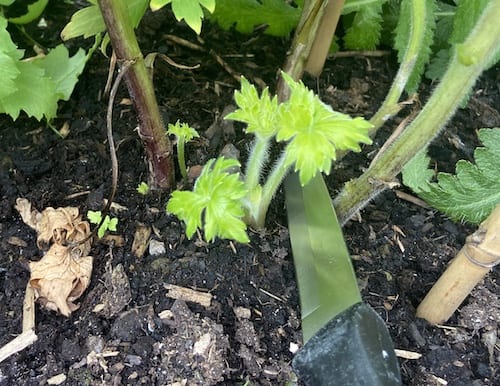
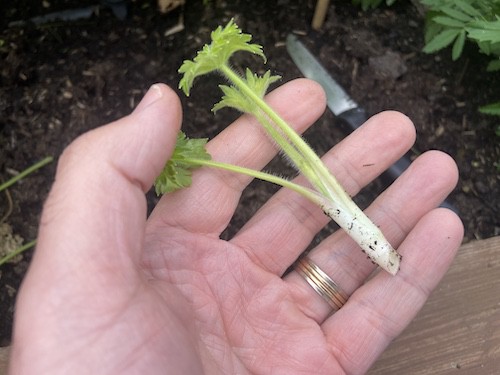
The best place to take a cutting is from the base of the plant. These are called basal cuttings and means you’re also taking a small amount of root (the bit thats look white) from just under the soil.
In the spring (March or April) when the new shoots appear, select one that is clear white and firm, and about 7cm to 10cm long. Check the shoot carefully for any sign of damage and disease. The article Problems with delphiniums including pests and diseases covers the main issues to look for.
Remove the shoot using a sharp knife right down to the base and try and get a sliver of root. Clean the cutting to remove all soil and other matter. Gently using a soft brush and warm water works well for this task. If you’re going to be taking several cuttings, place them immediately in a polythene bag with a little eater to keep them moist.
Cut off some leaves from the shoot, leaving just the tip and one or two leaves.
How to pot the delphinium cutting
I then recommend next dipping the shoot into copper fungicide to rid it of all potential fungal problems. If your garden is prone to fungal diseases, you may want to include this step but I have also propagated them without doing this.
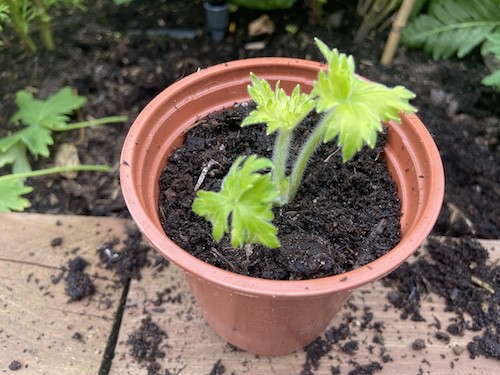
Fill small pots with a mixture of multi-purpose compost and perlite, I like to have a 50/50 mix. Ensure that this mixture allows the water to drain well through holes in the bottom of the pot.
Water the pots well. One option is to sit them in a tray of water so that the compost draws up water through the base of the pot. Remove the pots from the water when the compost is moist. You can also do this step after potting the cuttings if preferred, sometimes it’s just a little easier to insert the cutting on compost that is very moist and then water them.
Where to keep the cuttings
Place the pots with the cuttings somewhere that receives full sunlight but is out of the reach of direct sunlight. The pots should also be in a fairly cool – around 15˚C – location. A greenhouse shelf or a sunny windowsill are good locations for this. Mist the cuttings regularly to keep them moist.
When to transplant
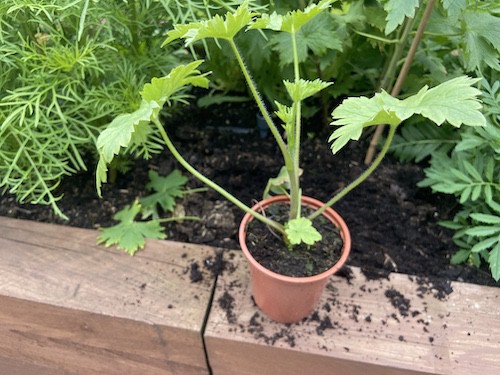
After 4 weeks or so, the cuttings will have developed sufficient root systems for you to transplant them.
Pot each one in its own individual 9cm pot (or 1 litre if you already potted them into 9cm pots) with, again, multi-purpose compost and perlite. Keep each one on the dry side until the roots are well established. When you’re re-potting the plants, check carefully for any pests and diseases, especially root rot that can affect cuttings.
Gradually expose the cuttings to more sunlight to get them used to a fuller day of sun.
Harden off
Gradually start to harden off the delphiniums from cuttings by moving them into the garden for a few hours a day. This should start sometime in May when the risk of frost has passed. Keep them sheltered from wind, rain and a late frost by bringing them back inside if these conditions occur.
Finally, once they are well rooted they can be planted out into their final positions or maybe even grown in pots which I also provide a guide on here. You can also learn how to overwinter them here.
You can also propagate delphiniums by dividing them which I talk about in this guide here.
I also have a general guide on propagating delphiniums which covers every method I use.
